Aung K. Soe and Professor Saeid Nahavandi
Centre for Intelligent Systems Research, Deakin University, Australia
Why is this useful?
Whitesides (2001) advocated that soft lithography can facilitate researchers to fabricate PDMS lab-on-a-chip devices with accessible and affordable resources [1]. A typical soft lithography fabrication laboratory requires master reverse molds, a PDMS pre-polymer mixer, scales for weighing, a vacuum desiccator, an oven and oxygen plasma treatment of PDMS surfaces to become hydrophilic [2].
In soft lithography, the PDMS elastomer is first mixed with the cross-linker (curing agent) in a weight ratio of 10:1. Stirring the mixture forms air bubbles. Traditional soft lithography protocols recommend using a vacuum desiccator before pouring the mixture onto the mold master. The PDMS pre-polymer is cured fully or partially inside the oven at 80 to 95 °C for 15 to 20 minutes, transforming the resin into solid silicone rubber. However, not all researchers who need to fabricate PDMS chips have all the resources stated.
LaFratta (2010) demonstrated that a laboratory centrifuge can be used to degas PDMS [3], but a desktop laboratory centrifuge (to degas) and an oven (to cure) may not be accessible or affordable to all researchers. The technique described here uses a handheld electric mixer to mix and degas the PDMS pre-polymer. An ordinary kitchen oven is used to cure the PDMS chip.
Since the food processor cannot be used for more than 3 minutes, the procedure is done in 2 sections, each lasting 2.5 minutes with 1 minute period between them. A Pyrex® petri dish is used to hold the reverse mold (master), so the dish will not deform inside the oven. The oven must be switched on and off so that the Pyrex does not crack.
What do I need?
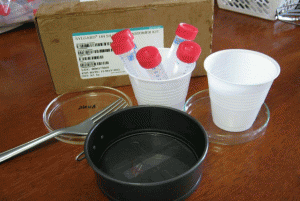
- SYLGARD 184 silicone elastomer base and curing agent (Dow Corning)
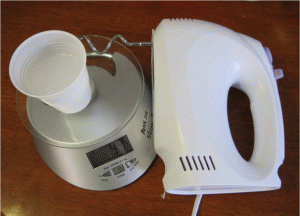
- a low-cost hand-held electric mixer
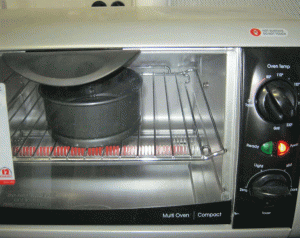
- a kitchen grill oven with sustained heating capacity at 80 °C
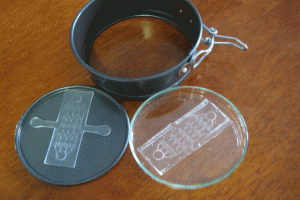
- a baking cup (or a Pyrex petri dish) and polystyrene petri dishes for PDMS chip storage
- a polished micro-machined or patterned reverse master mold that will not float on the PDMS pre-polymer
- a scale that can work in units of grams
- consumables: gloves, disposable cups, 2 or 4 plastic centrifuge tubes (15 ml capacity)
How do I do it?
1. Weigh the PDMS base and curing agent in the desired ratio in a disposable cup. 10:1 is the most common ratio, but any ratio can be used depending on the desired stiffness of the cured polymer.
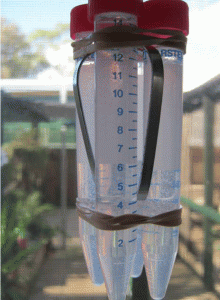
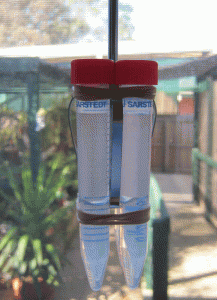
2. Mix base and curing agent together with the stirrer attachment of the hand-held electric mixer. Pour the pre-polymer evenly into 2 or 4 centrifuge tubes. If there is not enough pre-polymer for 2 or 4 tubes, fill 1 or 3 tubes and one more tube with water for balancing. It is important to balance the attachment during spinning. Tightly seal the centrifuge tube caps.
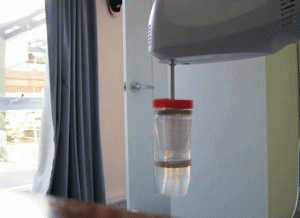
3. Tie the tubes to the stirrer attachments of the handheld mixer. Hold the mixer in a vertical position, switch on and spin for 2.5 minutes, then stop to give the spinner a rest for 1 minute. Turn the bottles 180 degrees and spin for another 2.5 minutes until all the bubbles have escaped from the pre-polymer mixture.
4. Pour the centrifuged PDMS onto the patterned reverse master mold in the baking cup or Pyrex petri dish.
5. Put the master mold container in the oven and cure at 80°C for 10 minutes if the baking cup is used. If the Pyrex petri dishes are used, the heat must be switched on for 5 minutes then off for 5 minutes since Pyrex dishes can crack under continuous heat. Switch the heat on and off for 30 minutes.
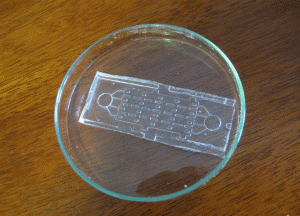
6. Peel the PDMS slab off the master using a sharp-tipped knife and store the PDMS chip in a polystyrene dish before autoclaving or treating with oxygen plasma.
What else should I know?
The reverse master can be fabricated in microfluidics fabrication foundries at Stanford University or California Institute of Technology. Reverse masters can also be made by machining pcrylic (also known as PMMA and plexiglass) with subtractive CNC machines such as the Roland DG MDX 40. Three-dimensional additive printers can also be used. Third-party service companies can also do micro-machining and surface polishing if one wishes to outsource the master fabrication task.
References
[1] G. Whitesides et al., Soft lithography in biology and biochemistry, Annu. Rev. Biomed. Eng., 2001, 3(1), 335-373.
[2] A. Harsch et al., Pulsed plasma deposition of allylamine on polysiloxane: a stable surface for neuronal cell adhesion, J. Neurosci. Methods, 2000, 98(2), 135-144.
[3] C. N. LaFratta, Degas PDMS in two minutes, Chips & Tips (Lab on a Chip), 17 August 2010.


