David Fernandez Rivas
Mesoscale Chemical Systems group, University of Twente, The Netherlands
Why is this useful?
Microfluidic chips and lab-on-a-chip devices are used at small scales where contamination has a significant impact on operation, or on the outcome of the measurement. Therefore, several cleaning steps are normally required during the production stage of the device, as well as before its actual use, to ensure that chips and connectors are properly clean. After precise connections and experimental preparation, the last thing a microfluidics user wants to observe on its microscope is a clogged channel with debris that could have been avoided. If this happens, the options to remove contamination inside microchannels and connections are unfortunately limited.
Typical chip cleaning protocols involve consecutive use of detergents, alcohol, acetone and demineralized water. Each of these liquids is used in glass or plastic beakers and placed in an ultrasonic bath for several minutes. These actions include handling steps that make the process tedious and time consuming. For example, the containers used need to be cleaned afterwards or in between cleaning steps, in order to avoid recontamination from previous jobs. Also, they significantly block the ultrasound pressure waves and therefore reduce the cleaning potential of the ultrasonic bath.
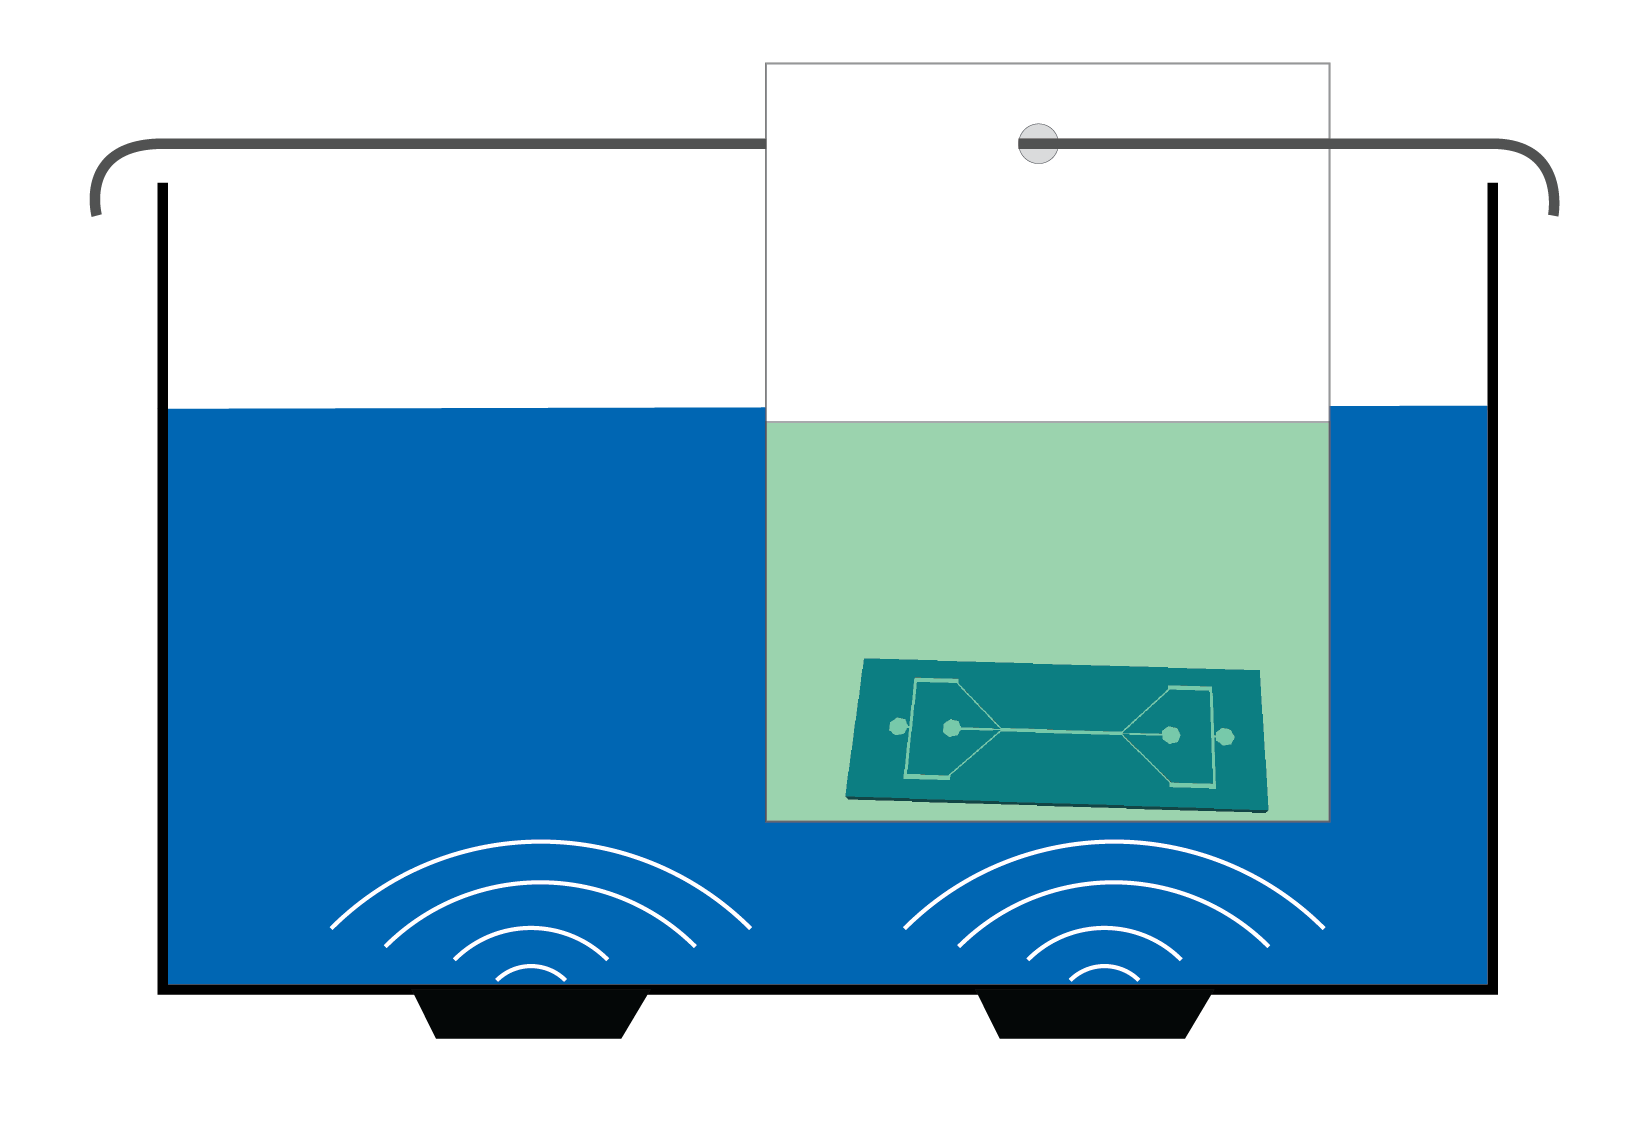
An alternative is to use disposable plastic bags, such as those you can find in regular shops and supermarkets, to replace the use of beakers [1-3]. Using bags can reduce the time and the complexity of cleaning microfluidic chips and other laboratory tools (connectors, tweezers, glass slides prior to plasma bonding to PDMS). Additionally, we have reduced the amount of liquids used routinely.

Figure 1. Sketch of the use of a bag for indirect cleaning of a chip inside an ultrasonic bath.
What do I need?
- Ultrasonic bath, filled with only water up to the indicated filling height
- Cleaning liquids
- Blunt tweezers
- Plastic bags from a nearby shop or commercially available bags (e.g., BuBble bags)
- Rod (e.g. 2 mm diameter stainless steel; length larger than one side of the ultrasonic bath)
What do I do?
- Place your chip or connectors inside the bag.
- Add the cleaning liquid to the bag. Volume: about 10-50 mL, depending on the size of the bag.
- Use the rod to hang the bag inside the ultrasonic bath, in a hot spot (above one of the transducers).
- Start the ultrasonic bath. We expect that it will take less time than what you would have used in the past.
- After ultrasonic cleaning, use the tweezers to retrieve the chip from the bag.
- Dispose of the liquid in the usual way, and throw away the bag (plastic recycling). Don’t reuse the bag, since it now contains contamination from the cleaning process, and this should not end up on the next chip.
What are the advantages of doing this?
Using ultrasound for cleaning is a common practice in almost all laboratories around the world. Ultrasonic baths are used specially when mechanical brushing or other cleaning procedures are not possible; e.g. fragile structures or small dimensions in a microchannel which are difficult to reach.

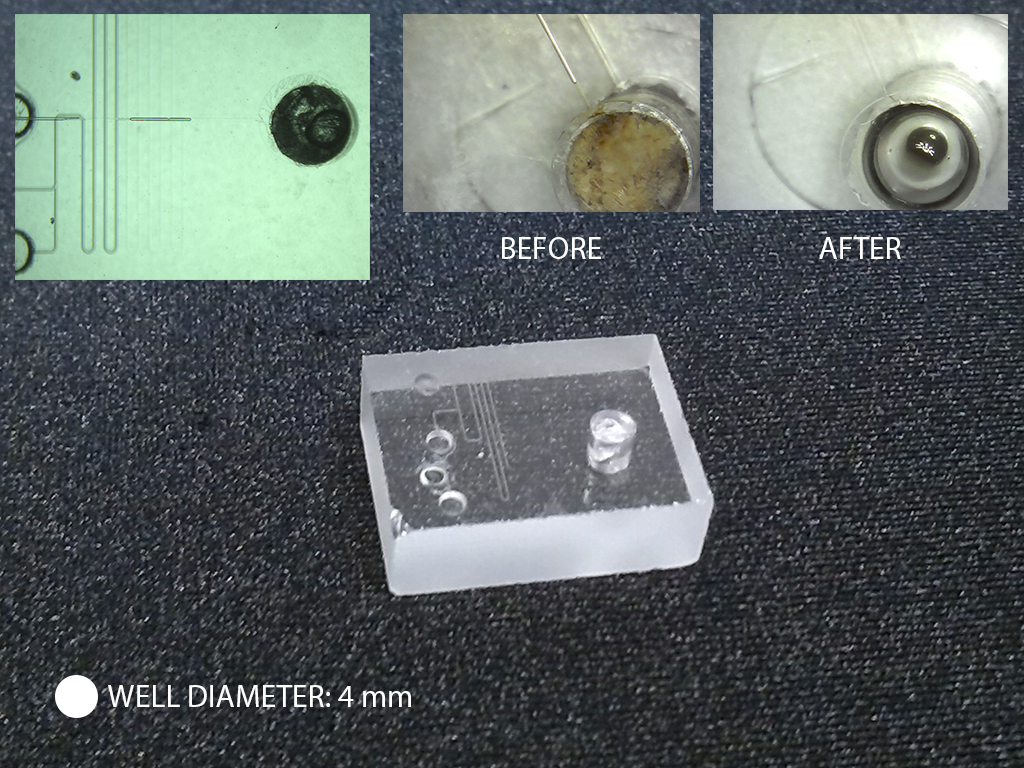
Figure 2. A glass microfluidic chip containing a large reaction/analysis well and several inlets and channels. Such a chip is difficult and not cheap to make; however the chip becomes unusable when the well is clogged with by-product of the reaction. Using ultrasonic cleaning inside a bag, the well can be emptied and the device reused.
The basic principle is based on the creation of small bubbles in the liquid. When these bubbles collapse, they emit powerful shockwaves and liquid jets, among other interesting effects. Combined with liquid motion induced by acoustic streaming, the collapse of bubbles contributes to remove debris from surfaces, even when the bubbles are not in direct contact with the surface[4]. That is the reason why, even when a closed microfluidic channel is placed in an operating ultrasonic bath, it is possible to clean the interior of the device. The more bubbles that exist in a liquid being sonicated, the more cleaning effect takes place.

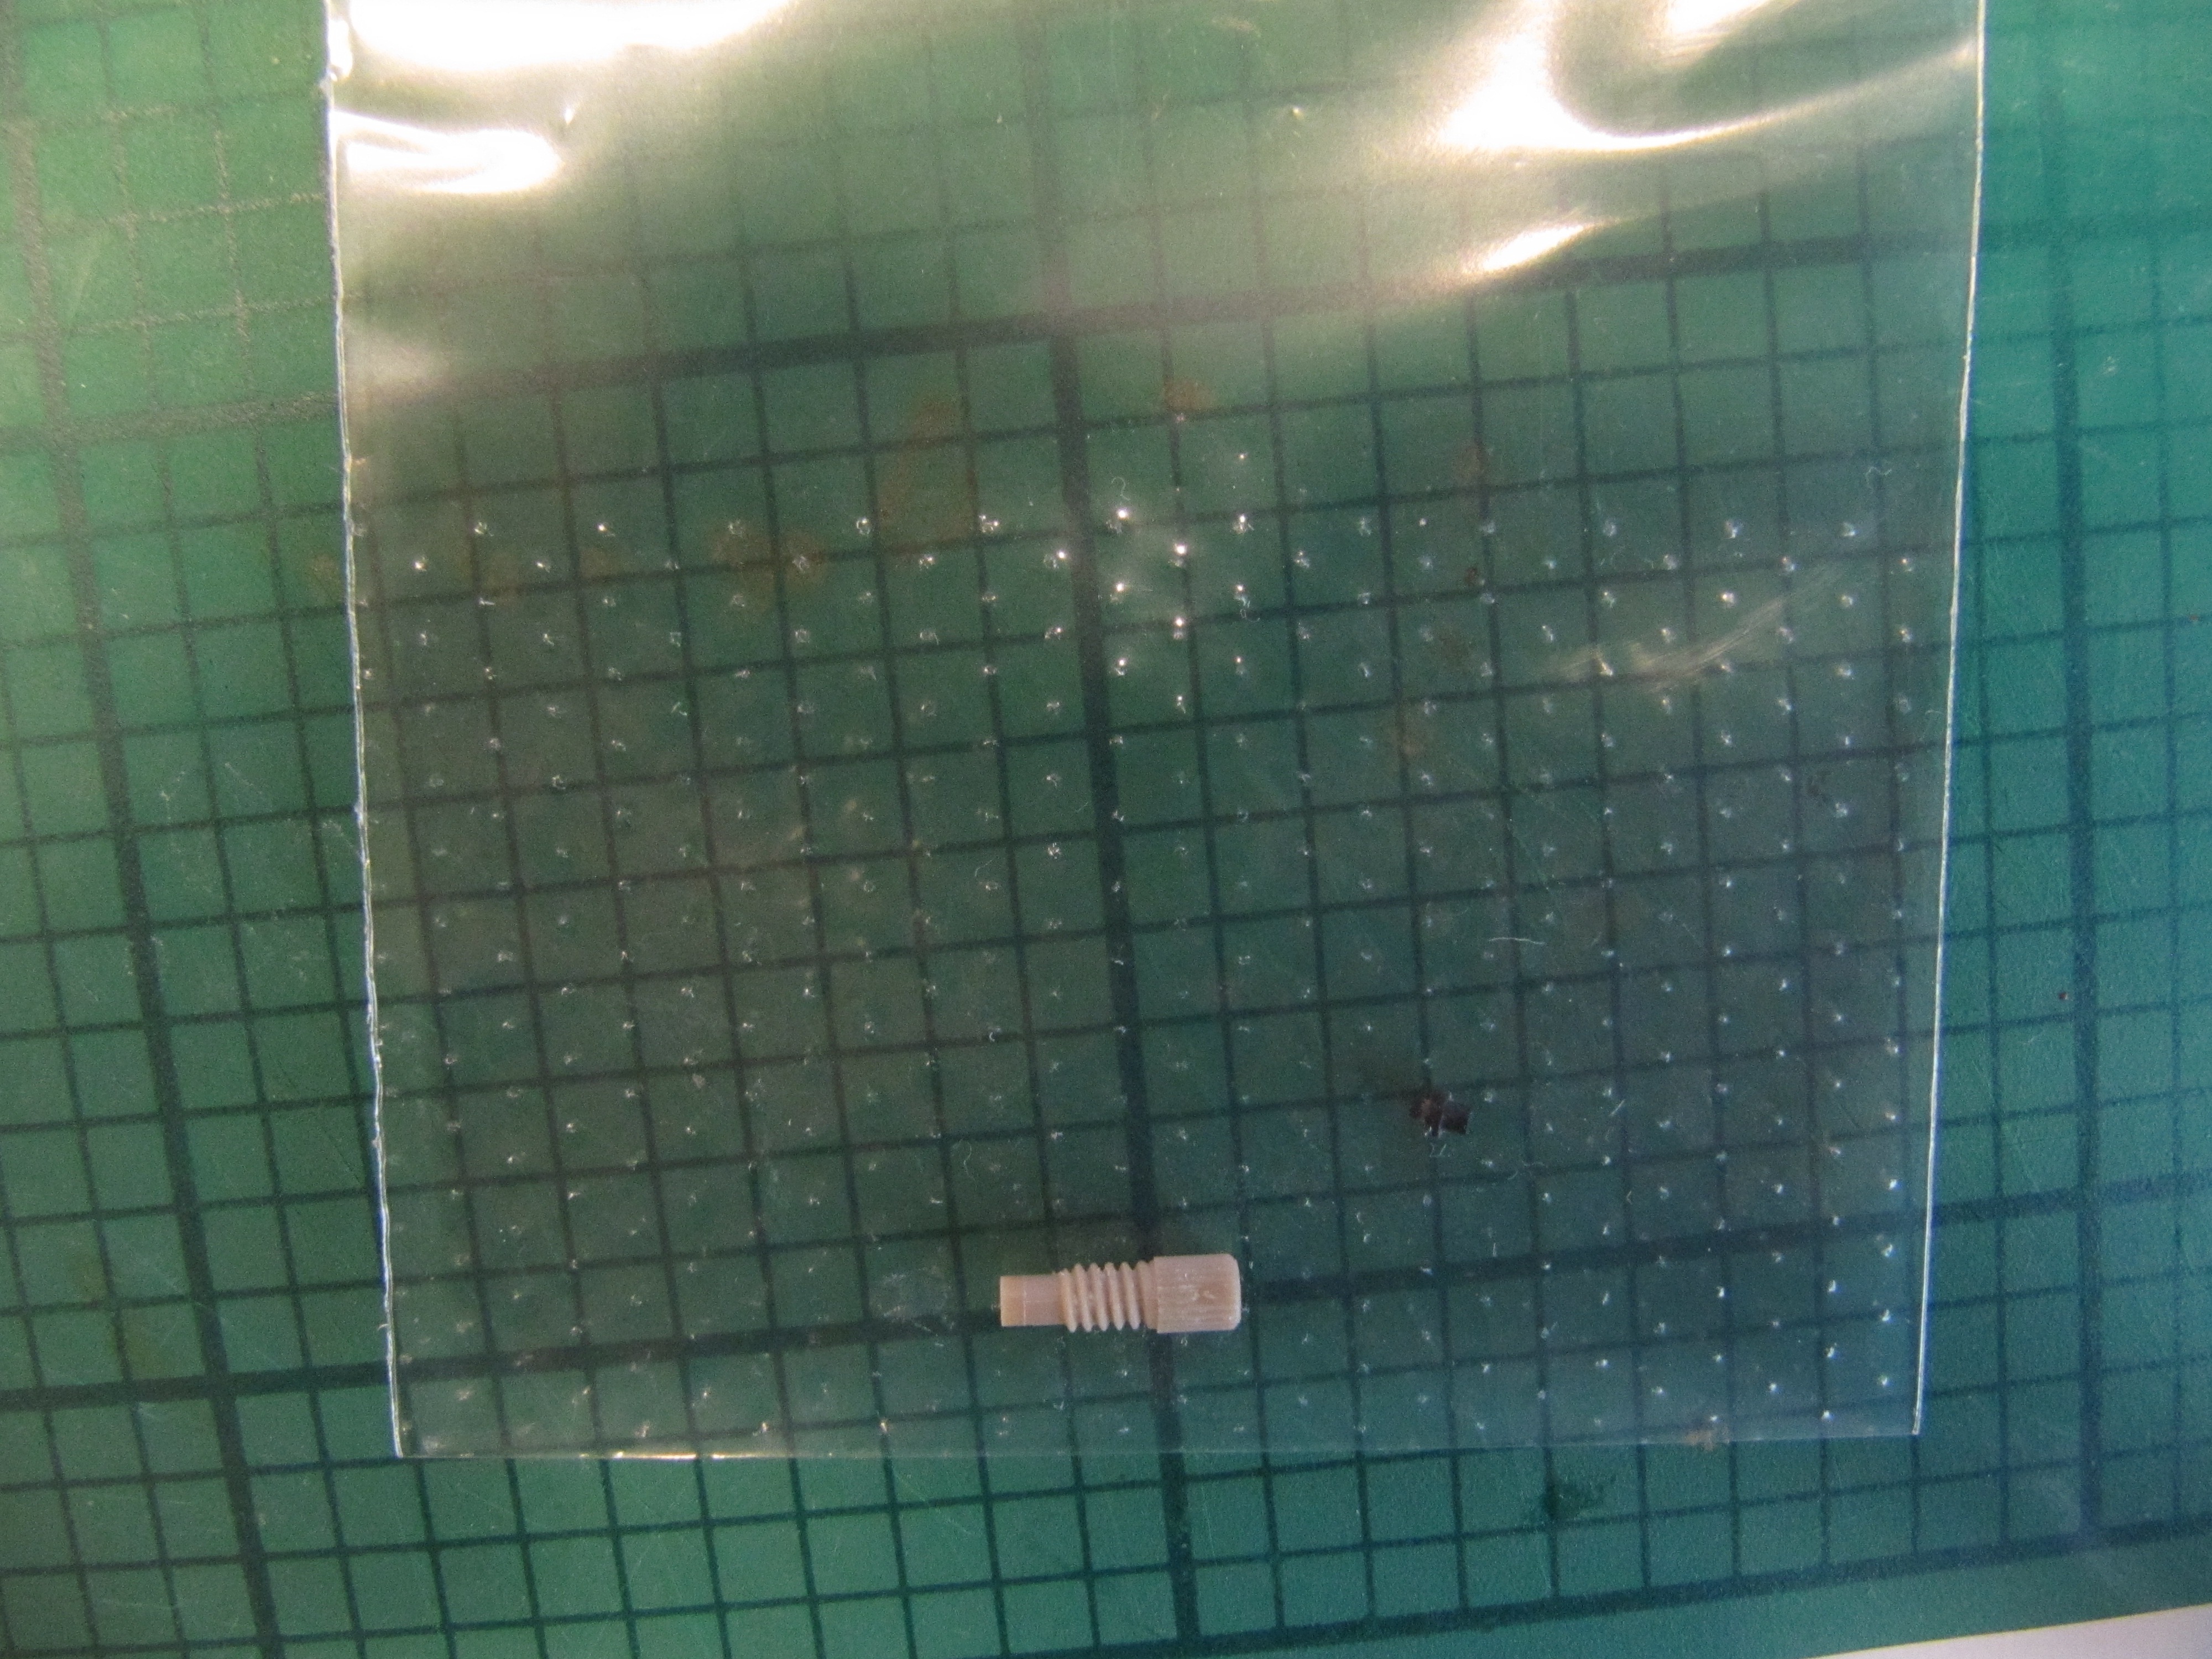
Figure 3. An Upchurch connector can become contaminated and is difficult to clean due to the small grooves. Ultrasonic cleaning ensures rapid cleaning of the connectors.
In plastic bags with thin walls, ultrasound is better transmitted than in glass or plastic beakers, leading to more bubbles and more efficient cleaning. Since the bags only need 10-50 mL instead of ~250 mL for a beaker, you save on chemicals and the volume of used solvents to be disposed. There is also an advantage in using less detergent for washing the glassware or other container used for cleaning, whereas plastic bags can be recycled for a milder ecological impact. Last but not least, when always using new bags, the risk of cross-contamination is drastically reduced.

Figure 4. An Upchurch ferrule is too small to clean manually, yet it may become clogged with particles or deposits. The panels on the right show a through-view of the ferrule, before use (note the particles already present), after clogging and after ultrasonic cleaning in a bag.
What else should I know?
A few tips & tricks:
- The water in the ultrasonic bath doesn’t need to be refreshed frequently, since all contamination remains inside the bags.
- Use blunt tweezers to avoid puncturing the bags.
- Fill the bag with the correct amount of liquid using a dosing bottle or fluid dispenser.
- Most plastic bags (PE or PP plastics) are compatible with alcohols, acetone and water-based cleaning liquids, but possibly not compatible with acidic or basic cleaning liquids. Making a simple test on chemical resistance is a fun thing to do; please keep us posted of what you find!
- Bags specifically designed to enhance ultrasonic cleaning by increasing microbubble production are commercially available (e.g., BuBble bags[5-8])
We would like to know if you find it useful or have suggestions to improve cleaning!

Figure 5. Image showing the connector and ferrule inside a bag for ultrasonic cleaning.
[2] http://www.practicalmachinist.com/vb/general-archive/solvent-ultrasonic-cleaner-89507/
[3] http://www.ccrexplorers.com/showthread.php?t=16892
[4] Fernandez Rivas D, Verhaagen B, Seddon JRT, Zijlstra AG, Jiang L-M, Van der Sluis LWM, Versluis M, Lohse D, Gardeniers JGE. ‘Localized removal of layers of metal, polymer or biomaterial by ultrasound cavitation bubbles’, Biomicrofluidics 6, 034114 (2012).
[5] Verhaagen, B. and Fernandez Rivas, David (2015) Measuring cavitation and its cleaning effect. Ultrasonics sonochemistry . 619 – 628. ISSN 1350-4177
[6] Fernandez Rivas D, Verhaagen B, Galdamez Perez A, Castro-Hernandez E, van Zwieten R, Schroen K. ‘A novel ultrasonic cavitation enhancer’, Journal of Physics: Conference Series 656, 1 1742-6596 (2015).
[7] www.bubclean.nl/bubble-bags-2
[8] Verhaagen, B. , Y. Liu, A. Galdames Pérez, E. Castro-Hernandez, D. Fernandez Rivas, ‘Scaled-up sonochemical microreactor with increased efficiency and reproducibility,’ Chemistry Select, 1(2), 136-139 (2016).
*Conflict of Interest Statment
David Rivas is a co-founder of BuBclean and is the CTO of the company. He does not receive financial compensation from BuBclean.


