Luis G. Rigat-Brugarolas1,2, Antoni Homs-Corbera1,2 and Josep Samitier1,2,3
1 Nanobioengineering group, Institute for Bioengineering of Catalonia (IBEC), Barcelona, Spain
2 Centro de Investigación Biomédica en Red de Bioingeniería, Biomateriales y Nanomedicina (CIBER-BBN), Zaragoza, Spain.
3 Department of Electronics, Barcelona University (UB), Martí I Franques, 1, Barcelona, 08028, Spain.
Why is this useful?
Microfluidic devices are often connected to external reservoirs in order to perform experiments with large samples or to generate some types of closed loop systems.1 When containing biological content, once sealed and fluidically connected, these reservoirs should allow proper gas exchange and facilitate their placement in a controlled environment such as an incubator.2 On the other hand, often the connections used for this kind of assays may also suffer from sample leakages.
In this work we present a simple and cheap way of facing these issues by introducing a fabrication methodology for a sealing cap made of poly(dimethylsiloxane) (PDMS) that can be used for any kind of reservoir or bottle. The cap can be customized in order to allow multiple tubing connections depending on the specific user needs. PDMS is easy to manipulate, it’s biocompatible and permits gas exchange.3 This solution, consisting on fabricating a flexible PDMS cap covering the reservoir, should become a versatile alternative to expensive or unreliable other strategies and could be used in several microfluidic applications.
What do I need?
- PDMS and crosslinker agent.
- Plastic or glass reservoir.
- Scalpel.
- Tubing.
- Oven.
- Harris Uni-Core punchers or any kind of punchers.
- Petri dishes.
- Plasma cleaner.
What do I do?
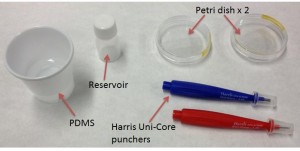
Figure 1 shows the basic utensils and products needed to fabricate the PDMS cap.
The steps are detailed next:
- Place reservoir/bottle in an upside down position inside a Petri dish. Fill the plate with PDMS as shown in Figure 2. In addition, fill another empty Petri dish with a thin layer of PDMS.
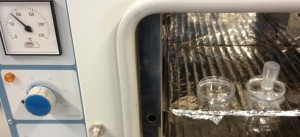
- Place both plates/samples inside an oven in a 65-90 ºC temperature range (depending on the reservoir’s material) for about 1.5 hours (Figure 3).
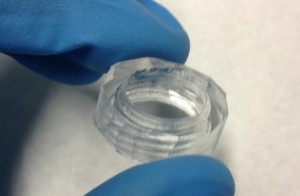
- Once the samples have polymerized, they have to be taken from the dishes (Figure 4), and the one corresponding to the reservoir cap replica can be cut, if needed, with a scalpel, as shown in Figure 5.
- After cleaning both samples with ethanol, they have to be chemically modified in O2 plasma (1 minute at high frequency, Figure 6) and immediately pressed together to form a permanent bond. It is important that the flat piece is sealed to the correct side of the cap replica.
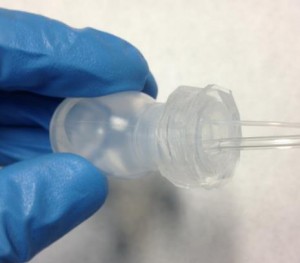
- Once the final piece is achieved (Figure 7 left), it is useful to use Harris Uni-Core punchers in order to pierce the sample with the diameter of the tubing that is going to be used. It is recommended to make the holes with a slighter smaller diameter than the outer diameter of the tubing to form a pressure seal between the tubing and the hole (Figure 7 right); this will prevent leakage of the sample or undesired particles entering to the reservoir.
- Finally it is possible to screw the PDMS cap into the reservoir (an example is shown in Figure 8).
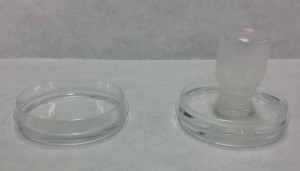
Fig 2: Fill two Petri dishes with PDMS, one with the reservoir (upside down) and the other just has to be covered with a thin polymer layer
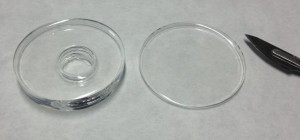
Fig 4: An example of two PDMS samples. The left one corresponds to the reservoir cap replica. The right one to the PDMS thin layer
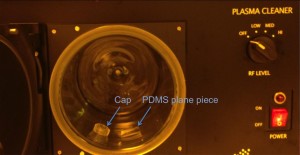
Fig 6: Dispose both samples in a plasma cleaner in order to chemically modify the PDMS surfaces and join the cap with the PDMS plane piece
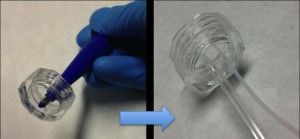
Fig 7: In order to pierce the access holes, a puncher is needed; afterwards the tubing can be connected to the PDMS cap
References
[1] Herricks T., Seydel KB., Turner G., Molyneux M., Heyderman TT., Rathod PK. (2011) A microfluidic system to study cytoadhesion of Plasmodium falciparum infected erythrocytes to primary brain microvascularendothelial cells. Lab Chip, 11, 2994.
[2] Rochow N., Manan A., Wi W., Fusch G., Monkman S., Leung J., Chan E., Nagpal D., Predescu D., Brash J., Selvaganapathy PR., Fusch C. (2014) An integrated array of microfluidic oxygenators as a neonatal lung assist device: in vitro characterization and in vivo demostration. Artif Organs, Doi: 10.1111/aor.12269.
[3] Regehr KJ., Domenech M., Koepsel JT., Carver KC., Ellison-Zelski SJ., Murphy WL., Schuler L., Alarid ET., Beebe DJ. (2009) Biomedical implications of polydimethylsiloxane-based microfluidic cell culture. Lab Chip, 9, 2132–2139.


