Ayako Yamada, Fanny Barbaud, Yong Chen, and Damien Baigl
Department of Chemistry, Ecole Normale Superieure, Paris, France
Why is this useful?
Controlling flows in a microfluidic channel by gas pressure is sometimes preferable due to the stability and quick response of flows. Here we describe an easy way of connection between a sample reservoir and tubing connected to a pressure regulator without gas leakage. With our tips, one can quickly prepare a sample reservoir; one can easily open and close it to refill during experiments; one can easily disassemble, clean, and reuse the system, if necessary. It is also possible to manage a small volume sample (e.g., 5 µL) by employing a micropipette tip.
What do I need?
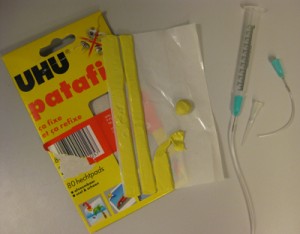
1. Patafix from UHU GmbH & Co. KG (Baden, Germany)
2. Plastic syringe without plunger (for a large volume sample; e.g., 100 – 1000 µL)
3. Needle for the syringe without pointed tip (for a large volume sample; e.g., 100 – 1000 µL)
4. Micropipette filter tip (for a small volume sample; e.g., 5 µL)
5. Tubing
6. Compressed air
7. Pressure regulator
8. PDMS channel
For a large volume sample (e.g., 100 – 1000 µL)
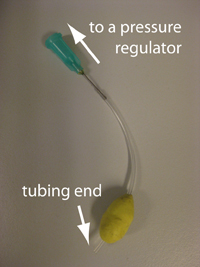
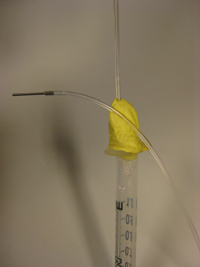
1. Wrap patafix around tubing to make a ball of approximately 1.5 cm diameter, leaving 5 mm from the tubing end (Fig. 1). The other end is to be connected with a pressure regulator. Put suitable accessories for your system.
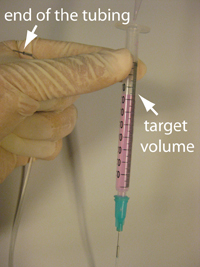
2. Connect a plastic syringe, a needle, and tubing. Hold the other end of the tubing, which is to be connected with your microfluidic channel, higher than the target volume in the syringe. Then fill the syringe with your sample using a micropipette (Fig. 2). Remove air bubbles by tapping, if necessary.
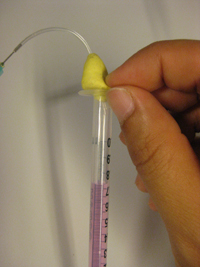
3. Insert the tubing with patafix prepared in step 1 to the open part of the syringe. Then squeeze the patafix into the syringe with your fingers so that about 5 mm of the syringe becomes filled (Fig. 3).
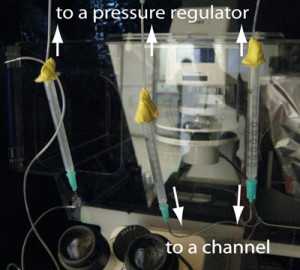
4. You can keep the tubing end accesible by sticking it on the patafix ball (Fig. 4). Connect the syring tubing to the pressure regulator keeping the syringe vertical. Following this way, your sample never touches patafix. It is convenient to place the pressure regulator high enough so that you can hang up the syringe from the regulator and maintain it vertical.
5. Connect the tubing with your channel and apply pressure (Fig. 5). This system can withstand operating pressures up to about 700 mbar (gauge pressure). You can open it by pulling the patafix out of the syringe, and easily refil with the sample, if necessary. If the tubing end is buried in patafix, simply tear off patafix until the tubing end appears. It is better not to try to dig patafix. It makes patafix go inside the tubing.
For a small volume sample (e.g., 5 µL)
1. Same as the step 1 described above, except that the diameter of the patafix ball should be about 2 cm.
2. Take your sample by micropipette. A pipette tip with a filter is preferable.
3. Remove the tip from the micropipette. If air comes up into the tip, you can get rid of it by tapping the tip gently until your sample goes back to the tip end. Then insert the tip into a PDMS channel inlet (we make inlet holes by punching through the PDMS with a syringe needle without a pointed tip and cleaning with isopropanol) (Fig. 6).
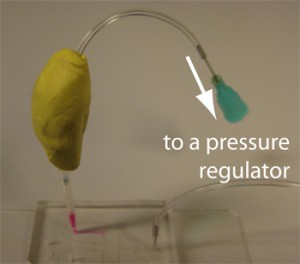
4. Connect the tubing and patafix prepared in the step 1 with the pipette tip. Try to make a homogeneous thickness (about 5 mm) layer of patafix around the connection and seal well (Fig. 7). Connect them to the pressure regulator and apply pressure. This system can withstand operating pressures up to about 300 mbar (gauge pressure).


