Pengfei Li, Wei Xue, Jie Xu*
Mechanical Engineering, School of Engineering and Computer Science, Washington State University, Vancouver, WA 98686, USA. E-mail: jie.xu[at]wsu.edu
Why is this useful?
Even though PDMS microfluidic devices have been widely applied in various research areas, it is still challenging to create the precise macro-to-micro interconnecting interface. Here we describe a method to connect a micro PDMS channel to the peripheral systems. With this method, we can avoid attaching exterior tubing using glue which is difficult to work with at the micro scale. In an effort to increase the connecting precision, a pre-curing step on a hot plate is adopted to prevent the tubing sliding away from the desired locations.
What do I need?
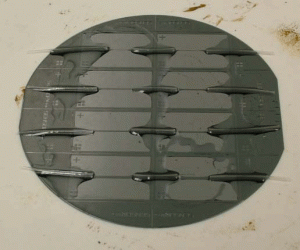
- BD Vacutainer winged blood collection sets. (Model: 23G⨉3/4” ⨉12”, Fisher Scientific, Pittsburgh, PA, U.S.A.)
- Dow Corning Silastic laboratory tubing. (11-189-15 Series, Fisher Scientific, Pittsburgh, PA, U.S.A.)
- Sylgard 184 silicone elastomer kit. (Dow Corning, Midland, MI, U.S.A.)
- SU-8 3050 permanent epoxy negative photoresist. (MicroChem, Newton, MA, U.S.A.)
- 4-inch silicon wafer, pipette, aluminum foil, hot plate, and oven.
How do I do it?
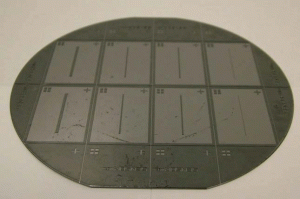
1. Prepare the SU-8 mold on a 4-inch silicon wafer with photolithography techniques. Based on the processes from the SU-8 data sheet supplied by MicroChem, SU-8 microstructures with approximately 50 µm in thickness are fabricated for this demonstration.
2. Mix the elastomer base and the curing agent (mass ratio 10:1) to form PDMS, remove the air bubbles thoroughly using a desiccator or a centrifuge [1].
3. Place the silicon wafer with the SU-8 channel molds on a hot plate. The temperate is set as 60oC under which the PDMS is able to cure in 10~20 minutes.
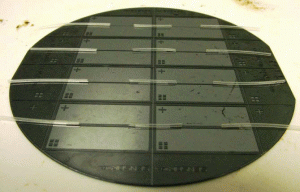
4. Cut the Silastic tubing into short pieces with proper length. Align the tubing section with the channel molds.
5. Apply a small amount of PDMS to fix the tubing sections. Due to the relative high temperature of 60oC, the PDMS is nearly cured in 10~20 minutes. This step ensures that the tubing sections stay in the intended places where they are well aligned with channel molds. The tubing is still filled with air, though both ends of the tubing are sealed by PDMS.
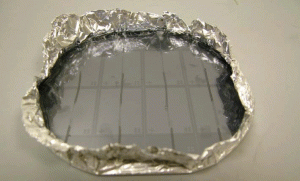
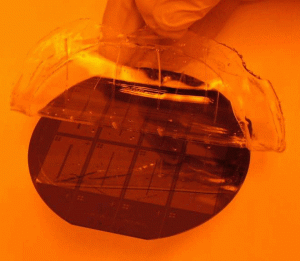
6. Use aluminum foil to wrap the silicon wafer and create a container for storing PDMS. Extra PDMS is then quickly poured into the container and later cured in an oven [2].
7. Peel the cured PDMS off the channel molds and cut the PDMS into channel devices.
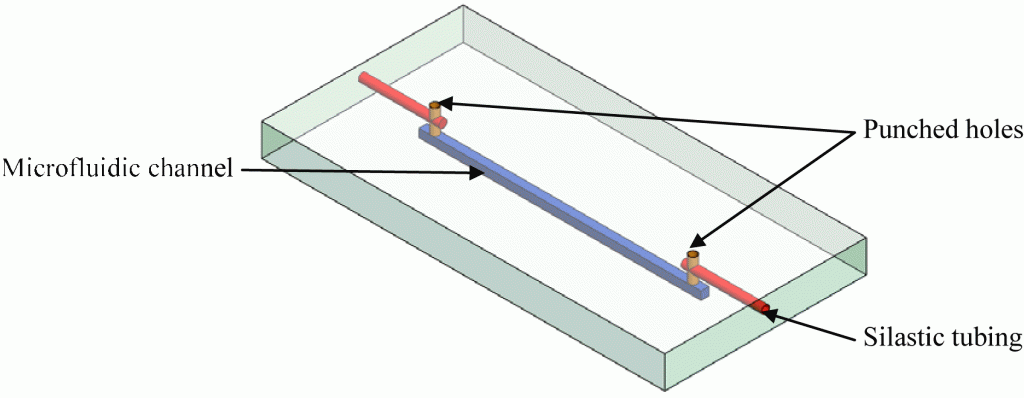
8. Punch a small hole on each end of the channel. The tubing sections can be connected to the channels through the holes.
9. Bond the PDMS channel to a glass substrate. Then bond another layer of PDMS as the top cover to seal the holes.
10. Insert needles into the tubing sections. This creates the connection for the PDMS microchannel.
References
[1] C. N. LaFratta, Degas PDMS in two minutes, Chips & Tips (Lab on a Chip), 17 August 2010.
[2] A. O’Neill, J. Soo Hoo and G. Walker, Rapid curing of PDMS for microfluidic applications, Chips and Tips , 23 October 2006.


