Arash Noori and P. Ravi Selvaganapathy
Department of Mechanical Engineering, McMaster University, Hamilton, Ontario, Canada
Why is this useful?
Sealing and bonding of components in PDMS (poly-dimethylsiloxane) molds using PDMS as glue is as challenging as it is effective because of the ability of PDMS glue to conform to nanometer sized features. An ever present problem is the flow of the uncured PDMS into undesired locations because of the deposition of large drops and the low viscosity of PDMS. This can lead to clogging of interconnects, channels and on-chip components in the assembly process thus damaging the device or necessitating repair.
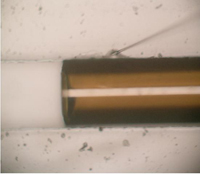
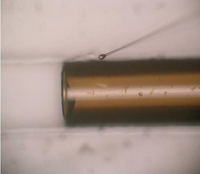
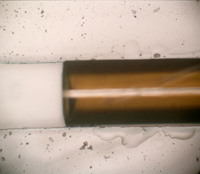
This tip presents a method for the deposition of microdrops of uncured PDMS using a micropipette and probe station micromanipulator to allow for highly controlled and localized sealing and bonding. This process can be used to seal interconnects in critical regions, to repair cracks and to bond components into microfluidic devices. It can be used for any process that requires highly localized deposition of PDMS to act as glue or sealant. For demonstration purposes this article will describe the process to embed and seal a 360 µm OD/20 µm ID fused silica capillary into a PDMS microfluidic device without clogging the opening.
What do I need?
- Fully cured PDMS microfluidic device
- Sylgard 184 silicone elastomer kit (Dow Corning)
- Probe station with microscope and micromanipulator probe
- Micropipette puller and borosilicate glass tubes (1 mm OD/0.5 mm ID, Sutter Instrument Company, California, USA) to fabricate micropipettes (may also be purchased from WPI Inc, Florida, USA)
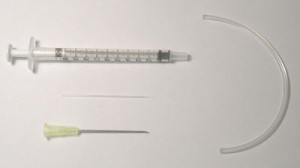
- Syringe (1 ml), needle (20G1½) and tubing (Tygon 2.4 mm OD/0.7 mm ID) (Figure 1)
- Epoxy
- Source of heat (hotplate or oven)
What do I do?
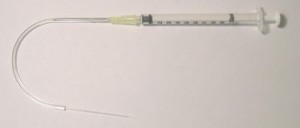
1. Connect the un-pulled end of the micropipette and the needle to opposite ends of Tygon tubing and seal using epoxy. (Figure 2) The tubing should be long enough to allow for pumping of the PDMS without disturbing the micropipette tip.
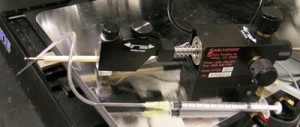
2. Carefully attach the micropipette to the probe station micromanipulator tip using adhesive tape. Make sure that it is firmly attached to the probe. (Figure 3)
3. Place the PDMS device onto the probe station and locate the place where deposition of the microdrops of PDMS is desired. Refocus and move the micropipette tip to the centre of the viewing area of the microscope.
4. Withdraw a small amount (<1 ml) of 1:30 ratio PDMS into the syringe and connect to needle.
5. Very slowly begin injecting PDMS into the tubing and micropipette, monitoring the movement of the PDMS in the micropipette until a drop of PDMS is visible at the micropipette tip.
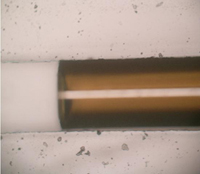
6. Refocus the microscope to the PDMS substrate below and bring the deposition area in alignment with the micropipette tip. Slowly start moving the probe station micromanipulator tip down until both the PDMS substrate and the micropipette are visible. Readjust the micropipette tip to the desired location using the micro adjusters. Slowly move the micropipette tip down. Once the micropipette tip makes contact with the PDMS substrate pause and let the PDMS drop flow into the desired region. More PDMS can be deposited by gently applying pressure to the syringe to cause more flow of PDMS to the deposition area. (Figure 4)
7. After deposition is complete, place the covered PDMS substrate onto a hotplate at ~95 ºC and cure for 10 minutes.
References
http://www.tygon.com/
http://www.dowcorning.com/
http://www.sutter.com/
http://www.wpiinc.com/


