Ivar Meyvantsson and David J. Beebe
Department of Biomedical Engineering, University of Wisconsin – Madison, USA
Why is this useful?
Poly(dimethylsiloxane) (PDMS) is hydrophobic in its native state. When fluid is forced into a PDMS microfluidic channel using pressure, bubbles are often formed. One way to facilitate filling is to make the PDMS surface hydrophilic by exposing it to oxygen plasma. However, bubbles can still form despite surface hydrophilicity and the lifetime of plasma-induced hydrophilicity is limited to a few hours. An alternative method of filling microfluidic networks and arrays has been reported by Monahan et al.[1], which is more effective than hydrophilic surface treatment alone. We present a procedure based on that described by Monahan et al. and provide additional comments related to cell biology applications of PDMS devices.
What do I need?
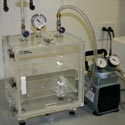
- Vacuum desiccator (e.g. Fisher scientific cat. no. 08-594-15A).
- Vacuum pump (e.g. Gast DOA-P704-AA, capable of producing 84kPa vacuum).
- Air filter (e.g Millipore Aervent-50 Disposable Filters).
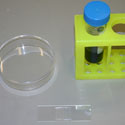
- An open container (e.g. petri dish) for microfluidic device. Choose a container that, when filled to cover the bottom surface, can be tilted to expose at least half the bottom surface.
What do I do?
1. Connect vacuum pump to vacuum desiccator outlet. If aseptic operation is required place air filter on desiccator inlet, spray inside of vacuum desiccator with 70 % ethanol (v/v in water) for sterilization, and wipe dry. Also, for aseptic operation, choose a container with a lid to enable transfer between biohood and desiccator.
2. Prepare a microfluidic device (e.g. PDMS part bonded to a glass slide), a container that holds the device (e.g. petri dish), and the solution you wish to fill the device with.
3. Place microfluidic device in the container.
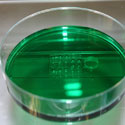
4. Fill the container with fluid such that all microfluidic device access ports are covered. Place the submerged microfluidic device in the desiccator.
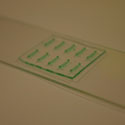
5. Turn the vacuum pump on, open the desiccator output valve, and close the input valve. Apply vacuum for 5-10 minutes. The bubbles that come out of the ports tend to cling to the rims of the ports.
6. Tilt the desiccator to expose the entire surface of the microfluidic device to air. This will “pop” all the bubbles. If tilting is insufficient, agitation (i.e., tapping, knocking, etc.) can also help remove bubbles.
7. Open the appropriate valve to bring the desiccator chamber back to atmospheric pressure. Visually inspect the channels to determine if they have been filled. Small bubbles (under 500 microns diameter) remaining at this point often disappear within 10 minutes if the device is left submerged in the fluid.
8. If bubbles persist, extending vacuum application or repeating steps 3 – 5 will improve filling.
9. This method works with a variety of fluids, including phosphate buffered saline (PBS), Dulbecco’s modified Eagle’s medium (DMEM) and protein-supplemented (e.g., bovine serum) DMEM, although proteins tend to modify the surface properties of PDMS making it more hydrophilic. The use of such fluids for initial filling is important when accurate concentrations are critical, such as in mammalian cell culture.
References
1. J. Monahan, A. A. Gewirth, and R. G. Nuzzo, A method for filling complex polymeric microfluidic devices and arrays, Anal. Chem., 2001, 73, 3193 – 3197.


