Corey Koch, James Ingle, and Vincent Remcho
Department of Chemistry, Oregon State University, Corvallis, Oregon, USA
Why is this useful?
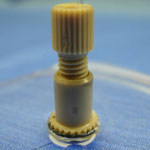
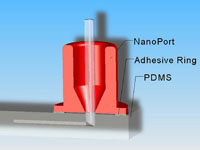
Upchurch (Oak Harbor, WA, USA) NanoPorts are one of the few commercial products on the market for making chip-to-world connections. NanoPorts are robust, easy to use, able to connect to standard tubing sizes (1/16-in OD and capillary tubing), and are particularly useful when connections are changed regularly. These fittings are constructed from polyetheretherketone (PEEK) and are intended to adhere to glass or silicon surfaces using epoxy or a heat-curable adhesive ring. The adhesive ring is compatible with many types of materials and NanoPorts have been used on a variety of polymers such as polycarbonate, cycloolefin (Zeonor), polyimide (Kapton), and polymethylmethacrylate.1-4 Unfortunately, NanoPorts do not readily adhere to one of the most common materials for prototyping microfluidic devices, polydimethylsiloxane (PDMS), and NanoPorts are often bonded to another material (commonly glass) in PDMS hybrid devices.5 A useful tip from Upchurch technical support is to imbed the NanoPorts into the PDMS chip during curing, but this can be cumbersome and PDMS only conformally seals to the PEEK surface so leakage can easily occur at the PDMS-PEEK interface. Fortunately, a tool common to the PDMS fab-lab, the oxygen plasma, can be used to bond PDMS to other substrates with the adhesive rings Upchurch supplies. Using an oxygen plasma to bond PDMS chips together using an adhesive tape has been mentioned in the literature,6 and this tip expands upon that work to form bonds between NanoPorts and PDMS using the supplied adhesive rings after exposing the PDMS surface to an oxygen plasma. It should be noted that the majority of this work was performed with the now unavailable acrylic-epoxy hybrid rings (3M Surface Bonding Tape 583), but the tip also works well with the new MEG-150 polyamide-epoxy resin adhesive ring.
What do I need?
- Fully cured PDMS (Dow Corning Sylgard 184) microchip with via holes to microchannels
- Upchurch NanoPort and supplied adhesive ring
- Oxygen plasma or another source to oxidize the PDMS surface (simple methods based on corona discharge, peroxide, and a home-microwave have been presented in the literature)7,8,9
- Clamp (try aluminum plates and a C-clamp or cantilever clamp)
- A heat source (convection oven recommended)
What do I do?
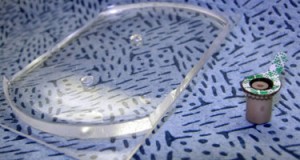
1. Prepare the PMDS microchip and NanoPort for bonding (Figure 1). Ensure the surfaces are fresh or clean with alcohol and air dry. If you are using the acrylic-epoxy hybrid adhesive ring, remove one side of the backing and stick it to the bottom of the NanoPort.
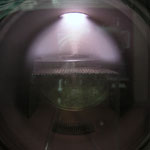
2. Oxidize the PDMS surface. This is commonly done in an oxygen plasma (Figure 2). Conditions vary, but based on experience and literature studies10,11 a pressure of 100 mTorr (oxygen gas), 20 W of RF power, and a 30 s exposure time provide an appropriate surface for bonding (ensure the surface is exposed to the plasma as in Figure 2).
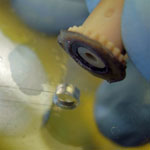
3. Quickly remove the PDMS from the plasma chamber and place the NanoPort with adhesive ring over the via hole to your microchannel (Figure 3). If you are using the new polyamide-epoxy resin adhesive ring, it is easier to place it on the oxidized PDMS surface using tweezers (because it is not tacky and won’t stick to the NanoPort bottom) and then set the NanoPort on top of it.
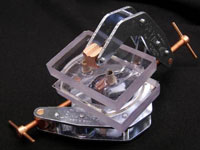
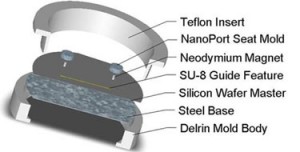
4. Clamp the NanoPort-adhesive-PDMS assembly and place it in an oven for the recommended curing time and temperature (see Upchurch technical notes and adhesive links, conditions vary based on the adhesives and temperatures used). For the acrylic-epoxy adhesive ring, a curing time of 2.5 hr at 100°C was used; for the polyamide-epoxy resin adhesive ring, a cure time of 1.5 hr at 165°C was used. Polycarbonate blocks (Figure 4) can be used for clamping at lower temperatures (< ~140°C); aluminum is suggested for higher temperatures.
5. Your well-bonded NanoPort interconnect to PDMS is now ready to use! (Figures 5 and 6). In control experiments without plasma exposure, neither adhesive adhered to the PDMS and they fell off with minor stress. Testing the bond directly after contacting the ring to oxygen plasma-activated PDMS surface (before heat cure) demonstrates bonding to the PMDS surface but not to the PEEK NanoPort. Failure testing of a completely bonded NanoPort results in tearing of the PDMS with the ripped polymer remaining on the adhesive ring. Bonds formed with the acrylic epoxy hybrid ring consistently withstood pressures up to 24 psi and several bonds withstood pressures above 40 psi, making the interconnect robust at pressures in the range of PDMS material failure (30-50 psi).12
Acknowledgements
This material is based upon work supported by the National Science Foundation under Grant No. DGE-0549503. This research was also supported by a research grant from the U.S. Environmental Protection Agency sponsored Western Region Hazardous Substance Research Center under agreement R-828772. This work has not been reviewed by the agency, and no official endorsement should be inferred.
References
[1] A. Muck and A. Svato, Rapid Commun. Mass Spectrom., 2004, 18, 1459-1464.
[2] S. J. Hart, A. Terray, T. A. Leski, J. Arnold and R. Stroud, Anal. Chem., 2006, 78, 3221-3225.
[3] Y. Yang, J. Kameoka, T. Wachs, J. D. Henion and H. G. Craighead, Anal. Chem., 2004, 76, 2568-2574.
[4] R. Barrett, M. Faucon, J. Lopez, G. Cristobal, F. Destremaut, A. Dodge, P. Guillot, P. Laval, C. Masselon and J.-B. Salmon, Lab Chip, 2006, 6, 494-499.
[5] L. A. Legendre, J. M. Bienvenue, M. G. Roper, J. P. Ferrance and J. P. Landers, Anal. Chem., 2006, 78, 1444-1451.
[6] L. Xie, S. C. Chong, C. S. Premachandran, D. Pinjala and M. K. Iyer, Electronics Packaging Technology Conference, 2005, 93-97.
[7] K. Haubert, T. Drier and D. Beebe, Lab Chip, 2006, 6, 1548-1549.
[8] G. Sui, J. Wang, C. C. Lee, W. Lu, S. P. Lee, J. V. Leyton, A. M. Wu and H. R. Tseng, Anal. Chem., 2006, 78, 5543-5551.
[9] B. T. Ginn and O. Steinbock, Langmuir, 2003, 19, 8117-8118.
[10] S. Bhattacharya, A. Datta, J. M. Berg and S. Gangopadhyay, J. Microelectromech. Syst., 2005, 14, 590-597.
[11] B.-H. Jo, L. M. Van Lerberghe, K. M. Motsegood and D. J. Beebe, J. Microelectromech. Syst., 2000, 9, 76-81.
[12] J. C. McDonald, D. C. Duffy, J. R. Anderson, D. T. Chiu, H. Wu, O. J. A. Schueller and G. M. Whitesides, Electrophoresis, 2000, 21, 27-40.


